

Aligning shingles on intelligent hip roof

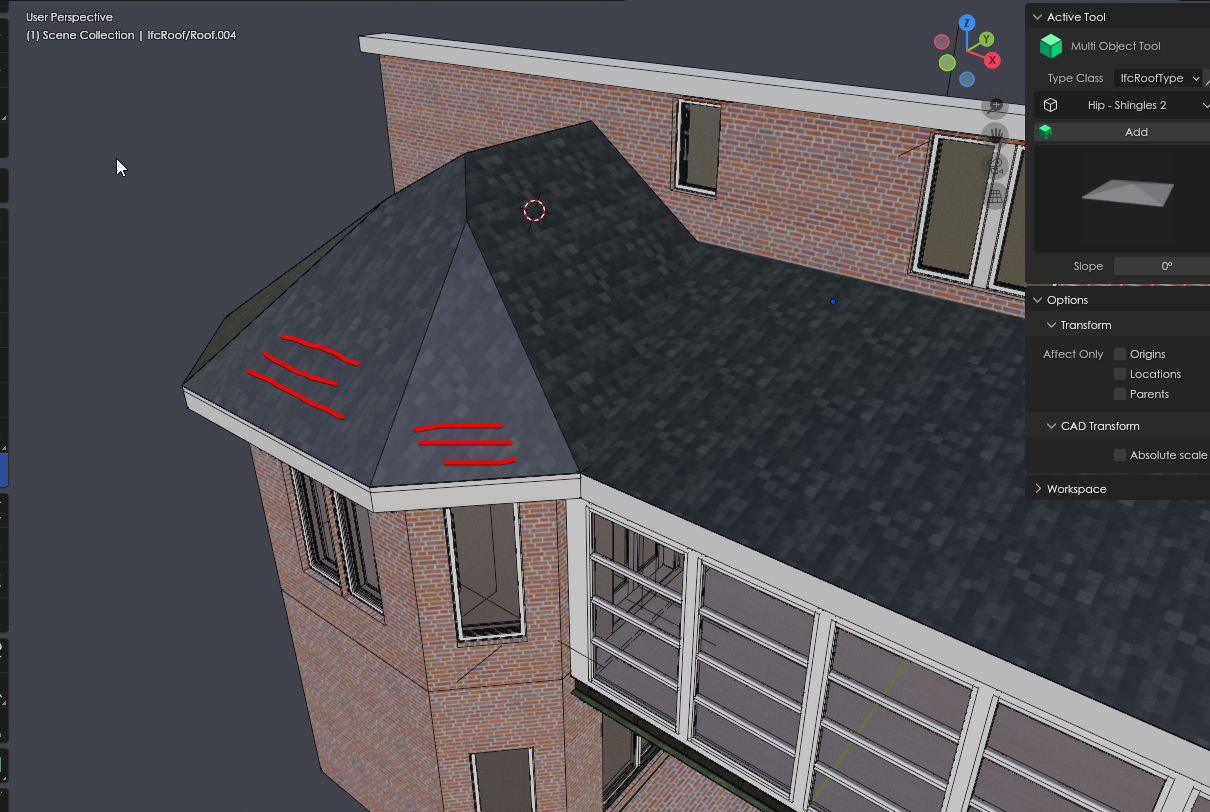
Anyone have an idea how to rotate the shingle texture in the following way, on a hip roof.
That is, without messing around with UV unwrapping.
See attached file.
Ping @Gorgious, i swore you did this once on this forum, but i couldn't find the post.

Comments
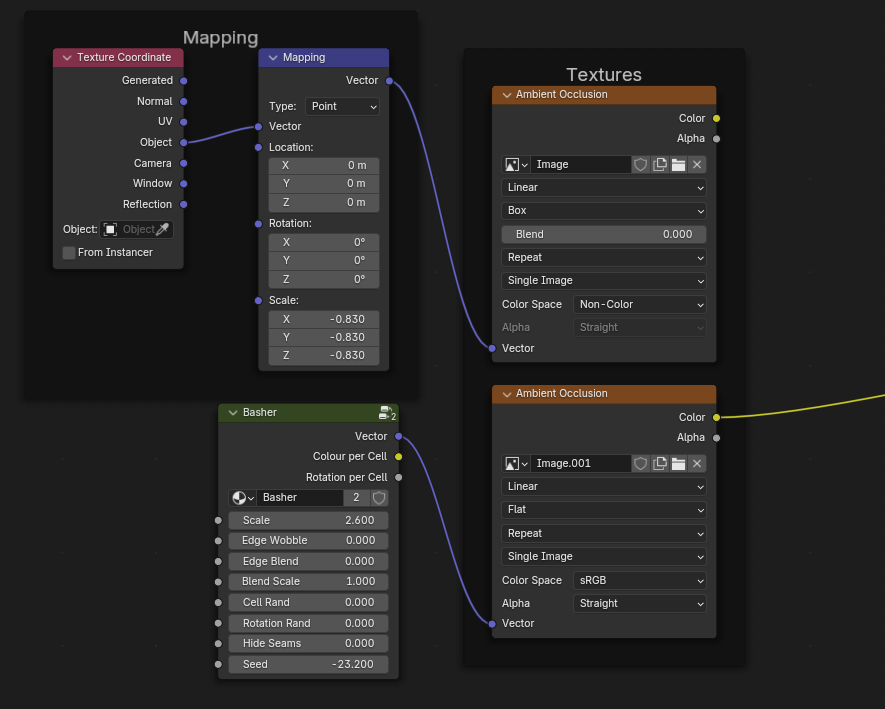
Without messing with UVs I don't know, maybe you want to use Box projection in the image texture node ? Or maybe use the texture basher by Erindale ?
So either / or
I asked this question on blender.stackexchange, and was directed to the following answer. I also attached the updated example file.
https://blender.stackexchange.com/questions/326305/how-to-map-a-texture-to-faces-using-geometry-normals
One hiccup i've noticed is that when the angle of the roof is increased past a certain point, a texture based material, stops working as expected.
As Daniel pointed out, i should use 'flat' instead of 'box'.
Do the following:
Now when rotating objects, if you use gimbal and stick to the Z and X rotations, the texture does not slide about. It also doesn't slide around when moving in any axis. Just avoid rotations on the Y. I just shamelessly copied this from the other texture mapping thread :-D
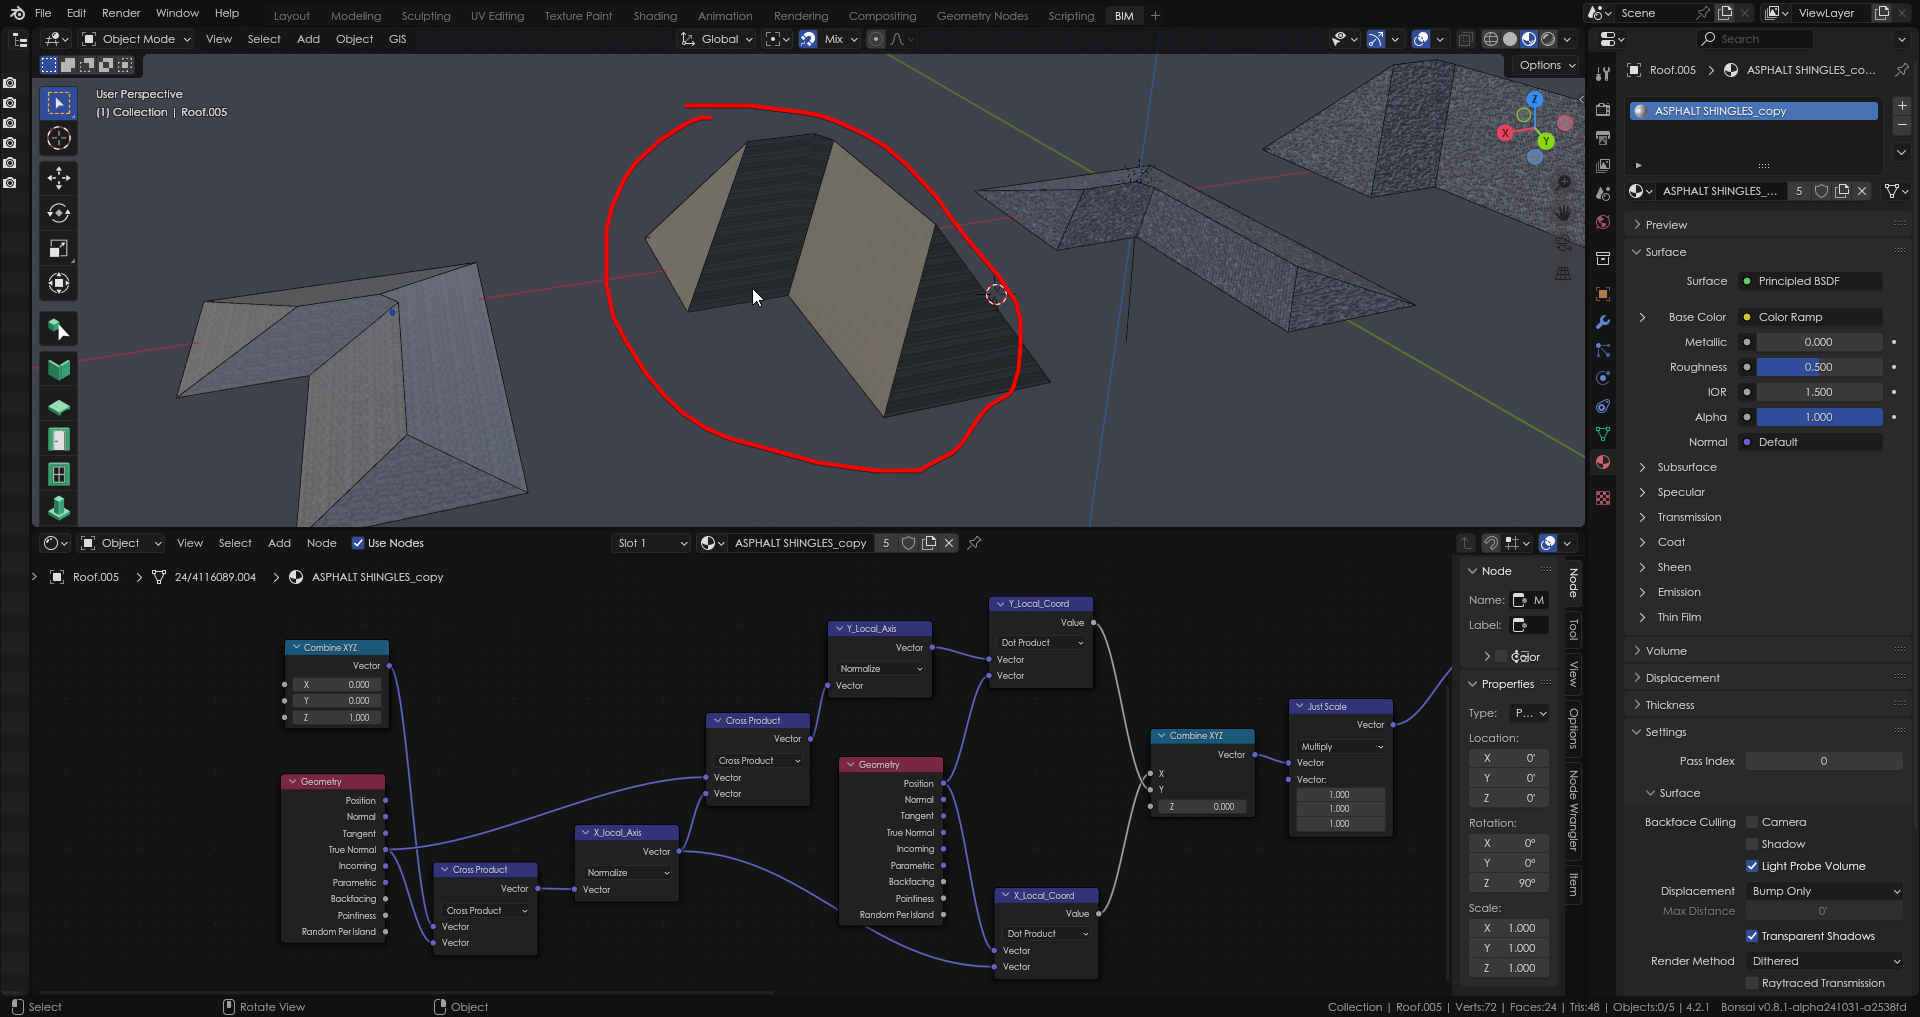
I had to futz around in the Mapping node to get the scale right, and my texture was "upside down" so I stuck 180 in the Rot-Z. The only thing that would perfect this is some way to align the texture across planes, but I have zero idea there - goat sacrifices and pentagrams needed for me to understand those dark vector arts:

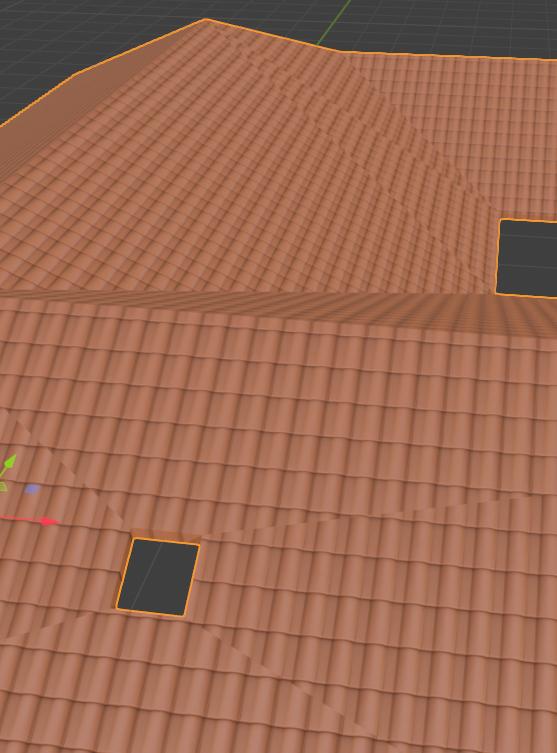
Hmmm. Unfortunately it looks a bit rubbish around rooflights or more complex geometry due to the triangulation:
@sjb007 did you try this solution. Seems to work nice.
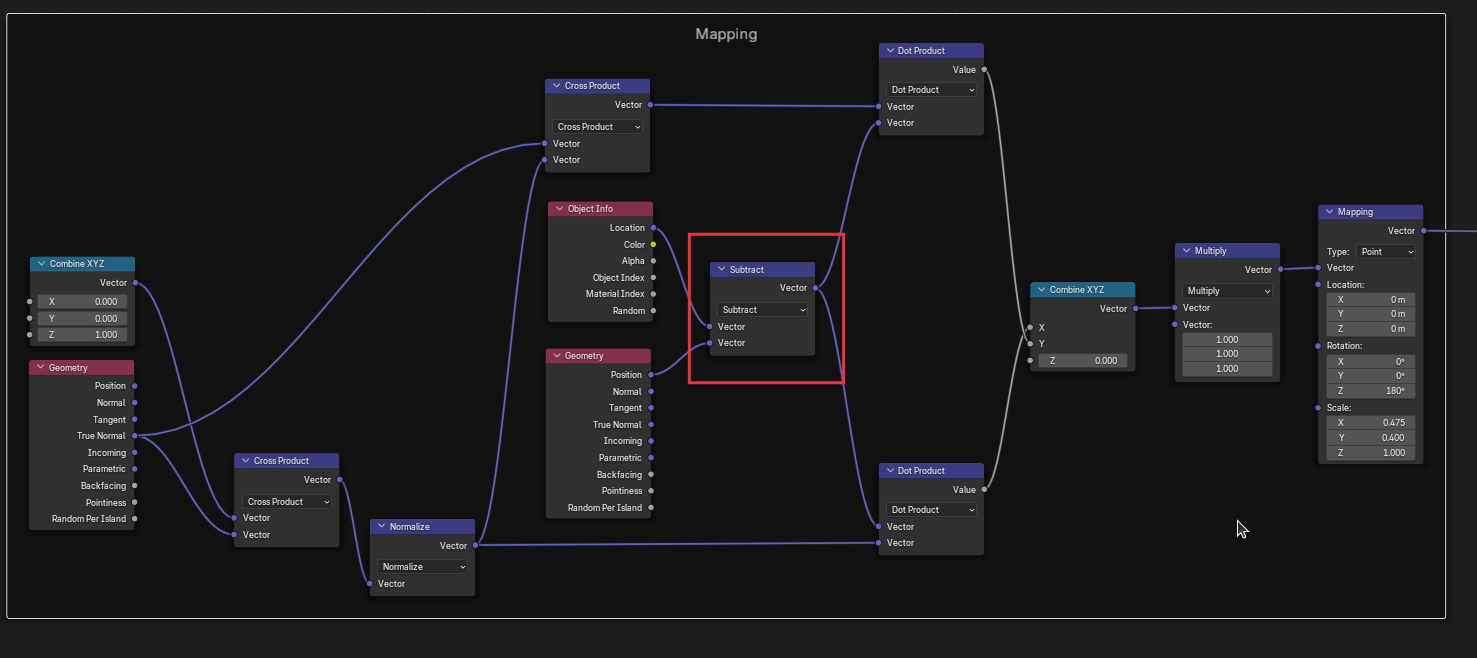
@theoryshaw That is what is in my first post above. It's a copy of your nodes above, with the addition of the Object and Vector subtract mentioned by @Gorgious in the other thread you opened : "How do you rotate the texture 90 degrees, but not have it 'stretched' on 4 sides of the cube?"
I suspect I'll have to resort to what I think you did in the Kegosa model, where you put individual coverings over each plane of the roof model. The tile texture just doesn't work (orientation, seams, alignment) applied to a whole roof item.
Aha! I have the culprit in custody! The problem is the normal maps. Use a Normal map in a Texture, or in an External style, and those triangulation lines are visible. Delete or disconnect the normal map, and everything looks good. Roughly the same screenshot, just with the normal removed:

Guess I should raise a bug about this. Easy to reproduce.
Anyone have this problem, where it gets pixelated when you zoom in?
files: https://hub.openingdesign.com/OpeningDesign/Verona_3_Season_Porch/src/commit/53e2affc7d78ea9f403278f77744b64096304b72/Open/Models/BlenderBIM/Verona_3_Season_Porch.ifc
Raised 5710
I can reproduce on my own version of your shader, although I have to zoom in quite far. I'm struggling to reproduce on a similar shader without all the clever stuff to the left of the mapping node. I'm using 2K images for my textures, although I think you are using procedural, so it shouldn't be a texture resolution problem on your side. At very extreme angles and zoom, you can see that Blender is blurring even plain normally mapped textures, probably to avoid pixellization:

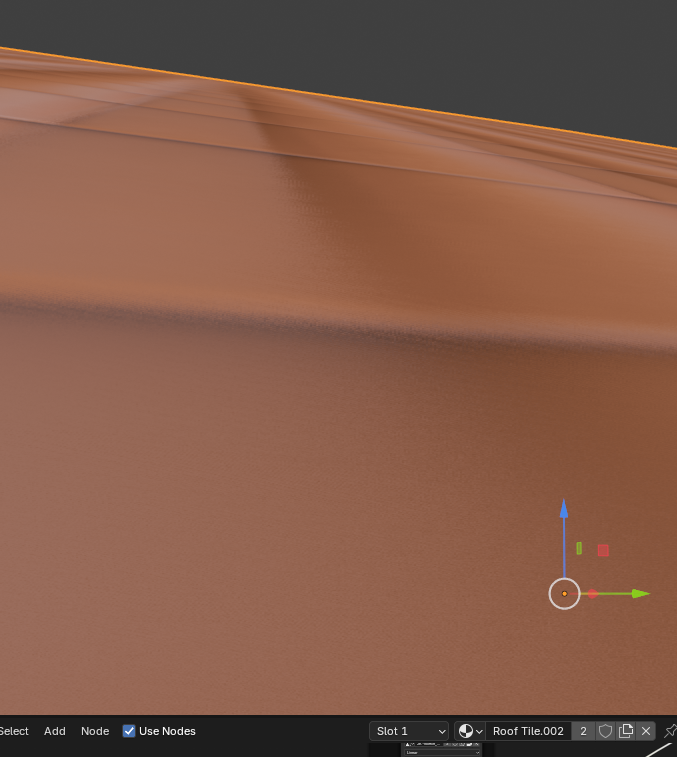
With your fancy shader you can see everything getting fuzzed out:
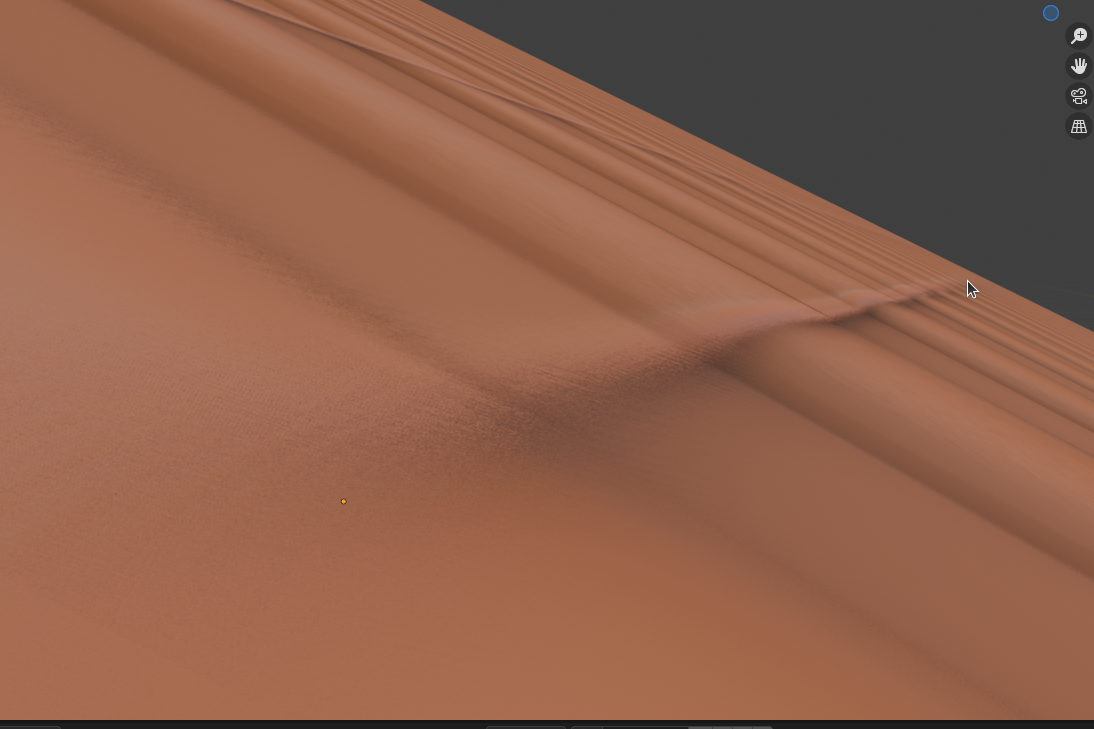
and a better angle:
You/we might just be hitting a natural limitation of the shader system here.
Following up on 5710 it turns out to be the normal mapping space of tangent that is the culprit. It needs to be in object space or even world space seems to work. This doesn't affect how the shader works so far as I can see.
Yes this would be awesome.
You're talking about aligning these, correct?
I guess now that i think about it, if the planes are at different z angles, they would not align in the real world either.

Yes, That was what I was aiming at, and you are right even though it still looks "wrong" :-D
In my case I can change the position of the meeting point to make all AoS equal. As well, my build has half round over cappings on each of those ridges, which would make the differences very hard to see. It's just the simple model which makes it visible.
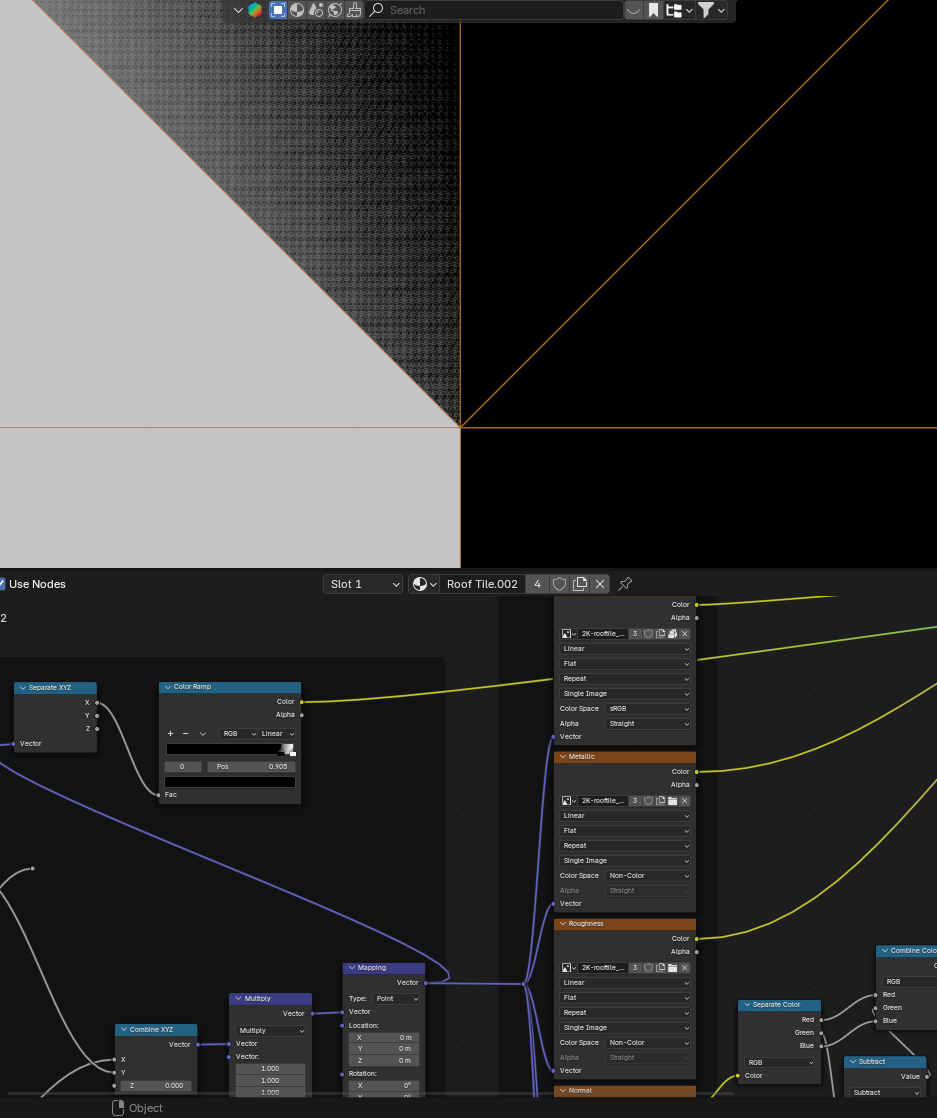
I also found (sort of) what is causing the fuzzing. The vector math is introducing noise in the X and Y channels of the mapping, i.e.
You have to dig around with the color ramp positions to find it, but it'll be there. I don't know if there's a way to eliminate the noise yet. I don't understand the principles well enough to know if the flaw is in the graph, or in the code.
Well I found a way to eliminate the noise and get super sharp detail at high magnification... switch to Cycles. Due to the EEVEE engine being a (near) real-time one I think that it is optimising the shaders, maybe even using lower precision, which is resulting in the noise. Switching to Cycles removes the noise but is, of course, much slower. As well as in the end result, I can see the noise being eliminated if look at the vectors, simply by switching to Cycles.
@theoryshaw You might also want to disable texture interpolation by setting it to "Closest". It will look pixelated instead of blurry though. :)
@sjb007 try to use a map range node instead of the color ramp, color ramp notoriously have bad interpolation and I remember them causing this kind of fuzzy result. FWIW if you're using a color ramp with a black stop and a white stop it is equivalent to a map range node eg those are functionally the same, except the Map Range node has a way better rounding handling
@Gorgious Switching the Texture Interpolation has little to no impact, which makes sense, because it's the noise in the vector that is the issue.
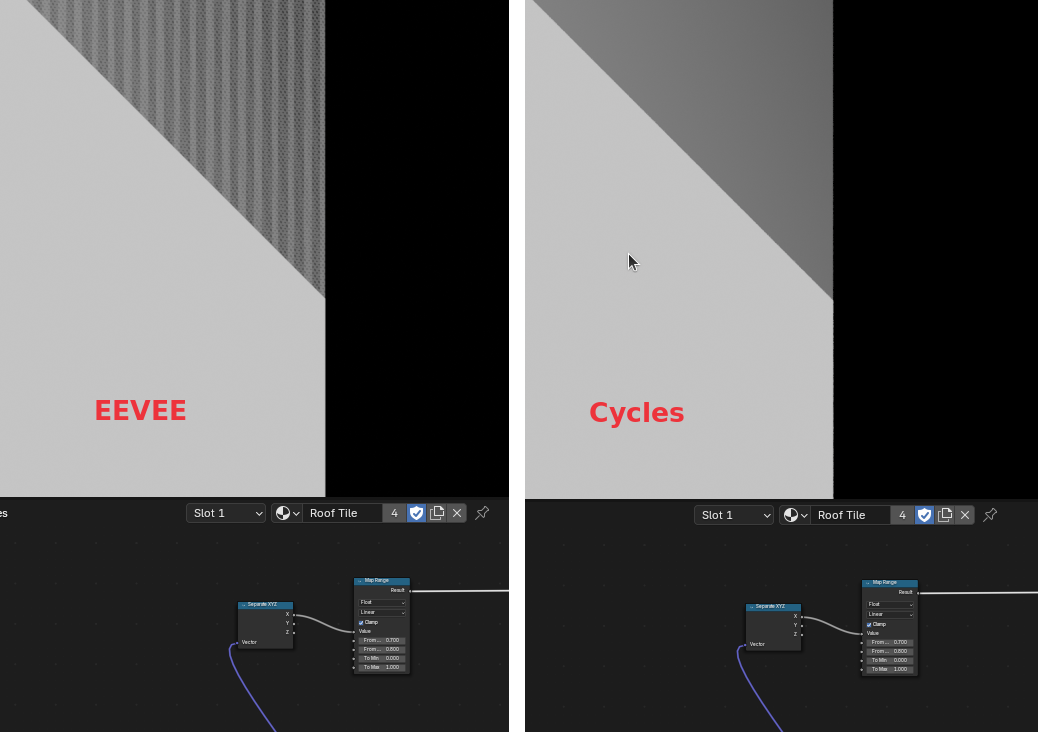
Thanks for the map range node. That is what I was looking for when I found the colour ramp first, but it displays the same issue:
All I did was switch engine. Like I said, some optimisation in the shader graph for EEVEE causes the noise in the mapping vector.