

Materials - Texturing - Cube Projection / Box Mapping (ArchViz)
As in this thread
In Architecture, 95% of my Materials would just need a repeating/Tiling Box projections with an origin and a Texture Size. E.g. a Brick Texture where I count the Bricks, set the Texture size according to the n*Brick grid, maybe adjust the origin and my building would have a perfect Brick layout over all Walls over the whole building. But Artist friendly 3D Apps often make a tedious UVW setup mandatory.
I always thought "Cube Projection" would be the simplest Mapping feature and available everywhere, as it was in all other CAD and 3D Apps I worked with so far - besides Blender. For me this is such an important feature, so a bit of a Blender show stopper.
It doesn't make sense to UV every building element and if you change a Wall's dimensions, the UV is broken. You want to control the Texture Mapping in the Materials. This way you set it up one time and it will work for any project.
There is an old Video, which I find quite interesting, which explains many of the problematic aspects in Blender : 
I went through a lot of such workarounds like in that Video or downloaded and tried a few (quite complex) Node Group Setups but so far did not really find what I am searching for.
I also read through https://ifc43-docs.standards.buildingsmart.org/IFC/RELEASE/IFC4x3/HTML/lexical/IfcSurfaceTexture.htm docs but I do not really understand. Could things like https://ifc43-docs.standards.buildingsmart.org/IFC/RELEASE/IFC4x3/HTML/lexical/IfcCartesianTransformationOperator2D.htm or https://ifc43-docs.standards.buildingsmart.org/IFC/RELEASE/IFC4x3/HTML/lexical/IfcTextureCoordinate.htm be used for that in Bonsai ?
Comments
Here are 2 examples of how such "Box Mapping" user interfaces I was used before.
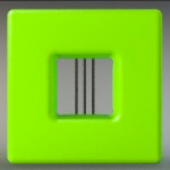
First, the most rudimentary version I found in my CAD :
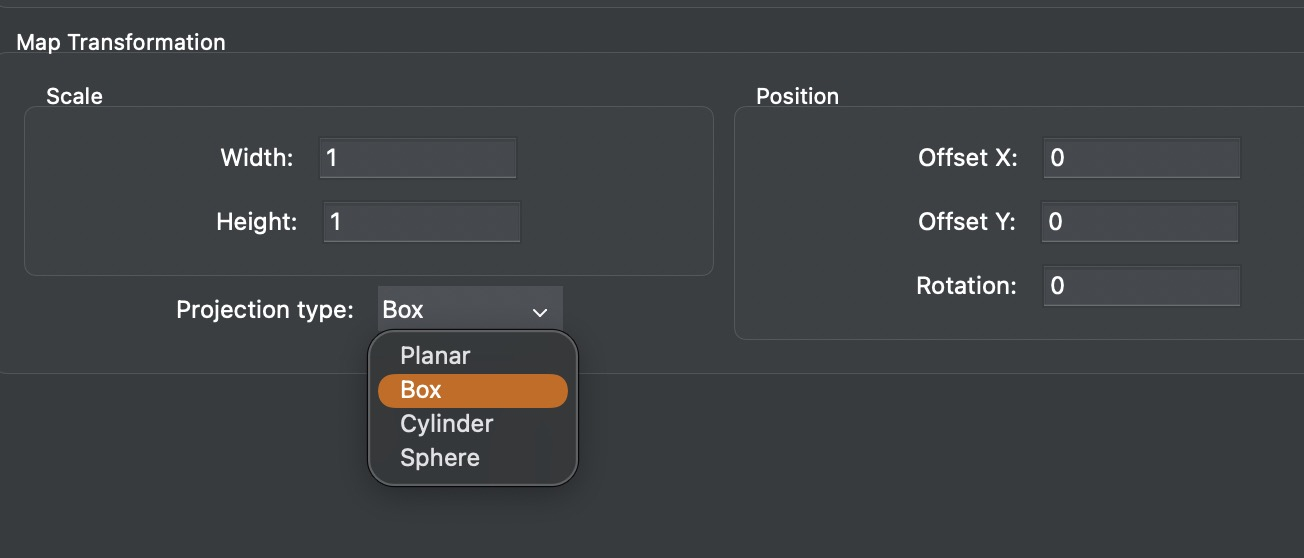
Second, this is a more advanced example of one of my typical 3D Apps :
Those were very fast and comfortable to use.
What is important and needed is :
Box Size
(To adjust to the real size of the Texture content (and aspect ratio) - in X, Y and Z - in real Units)
Rotation
(Like when having some linearity, to e.g. orient a wood texture direction along an Object)
Position
(Basically an offset, to e.g. orient a Bricks Texture to your Buildings Bricks Grid)
@zoomer
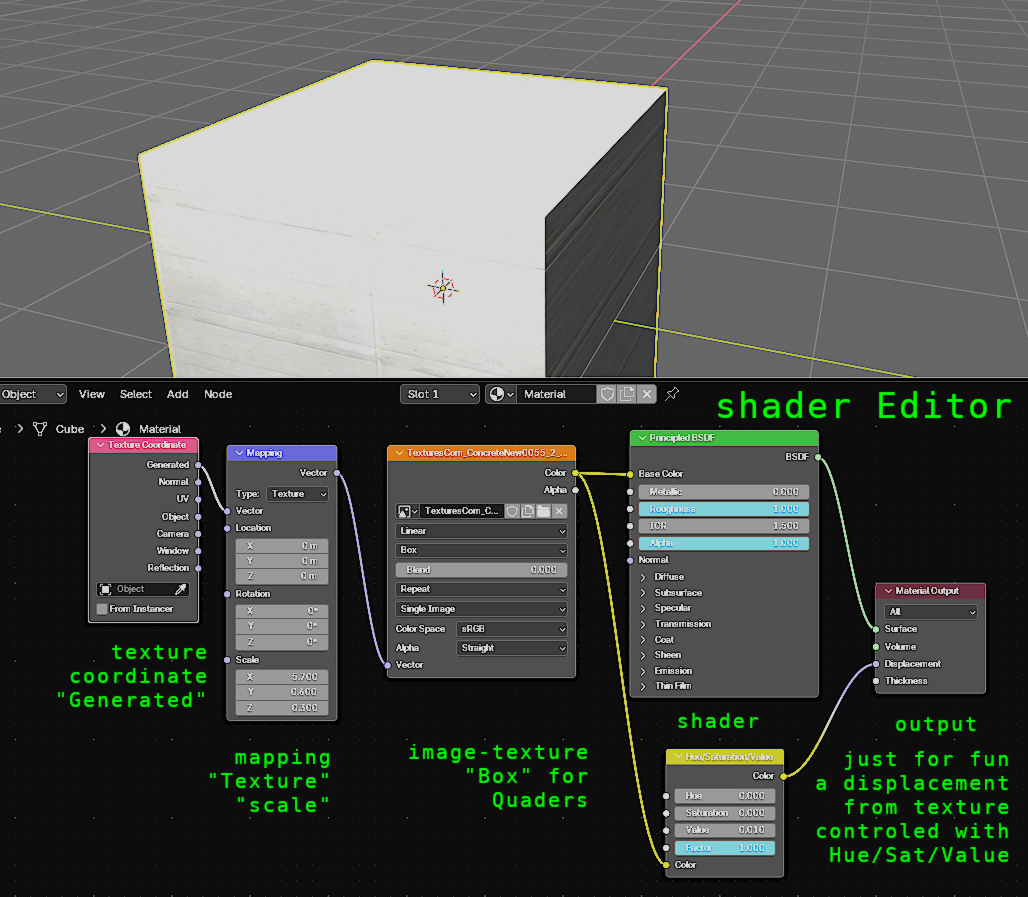
I know some try to avoid the shadereditor, but its not hard, to do a easy setup. (Hint, look for vids to control Textures with "black and white" whats equal to "0 to 1").
In the pic a very simple Setup, just drag and drop the Texture in and add 2 (with displacement 3) nodes and you are in control. (UV- map would be an extra step)
Ahm, I am sorry,
this is one of the most basic setup, this is not what I want.
There is no control about dimension in units, you can't rotate a Texture (you would need in PS - for all Texture files) and "Generated" Mode even works for one side of a Cube only (The rest behaves as if you would just using "Flat" Mapping)
It would work a bit better if you use "UV" mode instead - and apply a dummy geometry. But it is still error prone and far away from what any simplest cheap Cube Projection can do anywhere else.
But the man in the video explained it much better than I ever could.
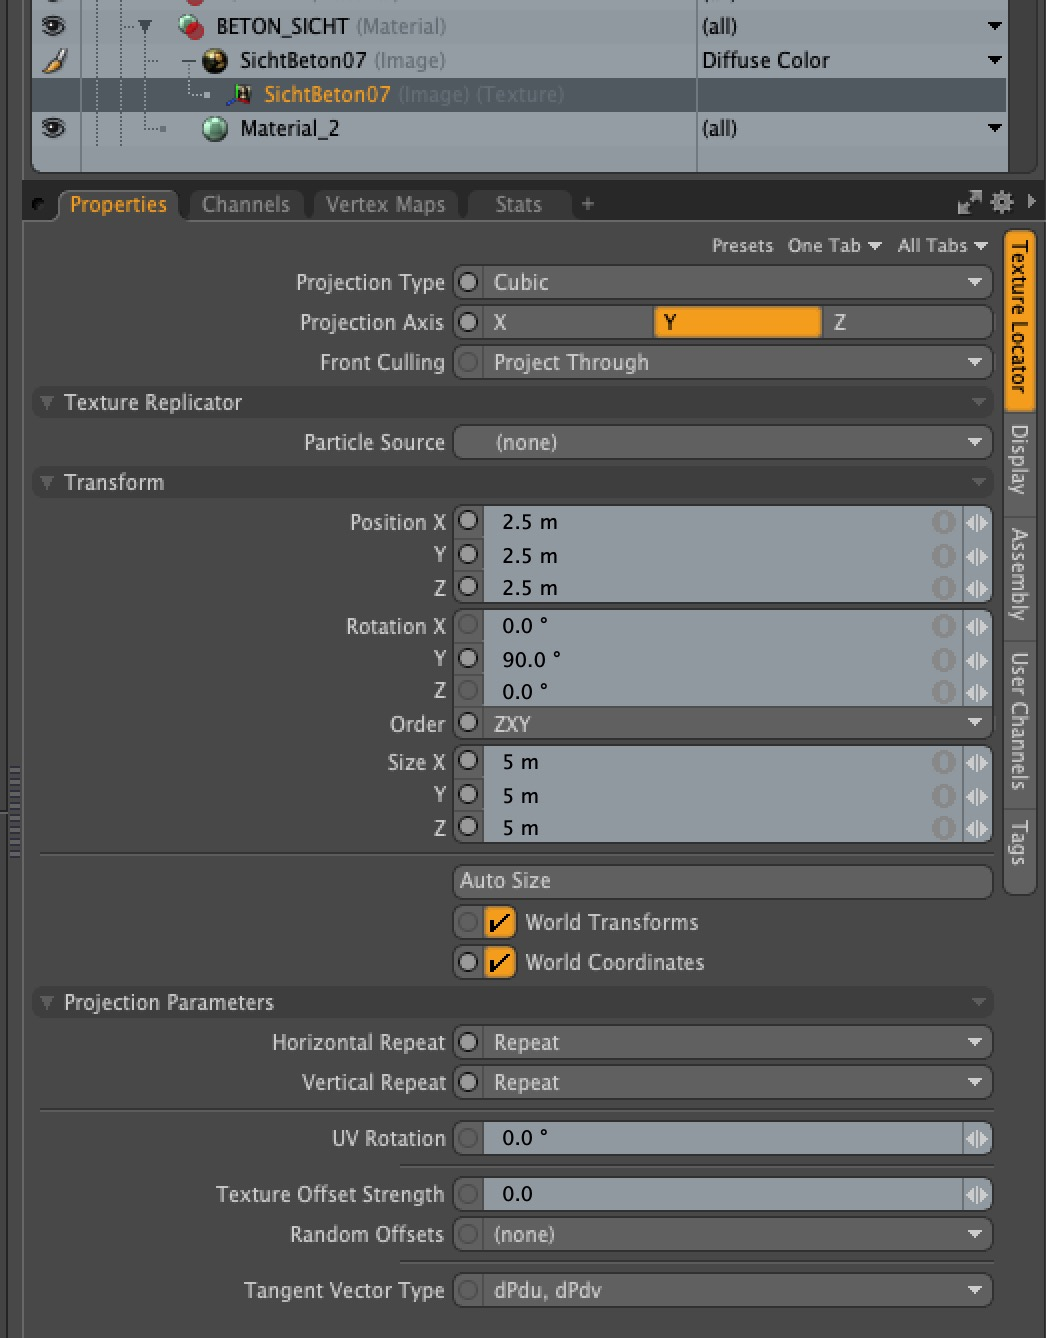
@zoomer all ifc objects have the scale applied, if you are using simple blenderobjects try to apply scale first. "Ctrl+A" and u are back in business. And at the texturenode switch to box.
You can find some workarounds that try to force the Mapping Node (*) to behave like a usual Box Projection - like this Node Group Setup :
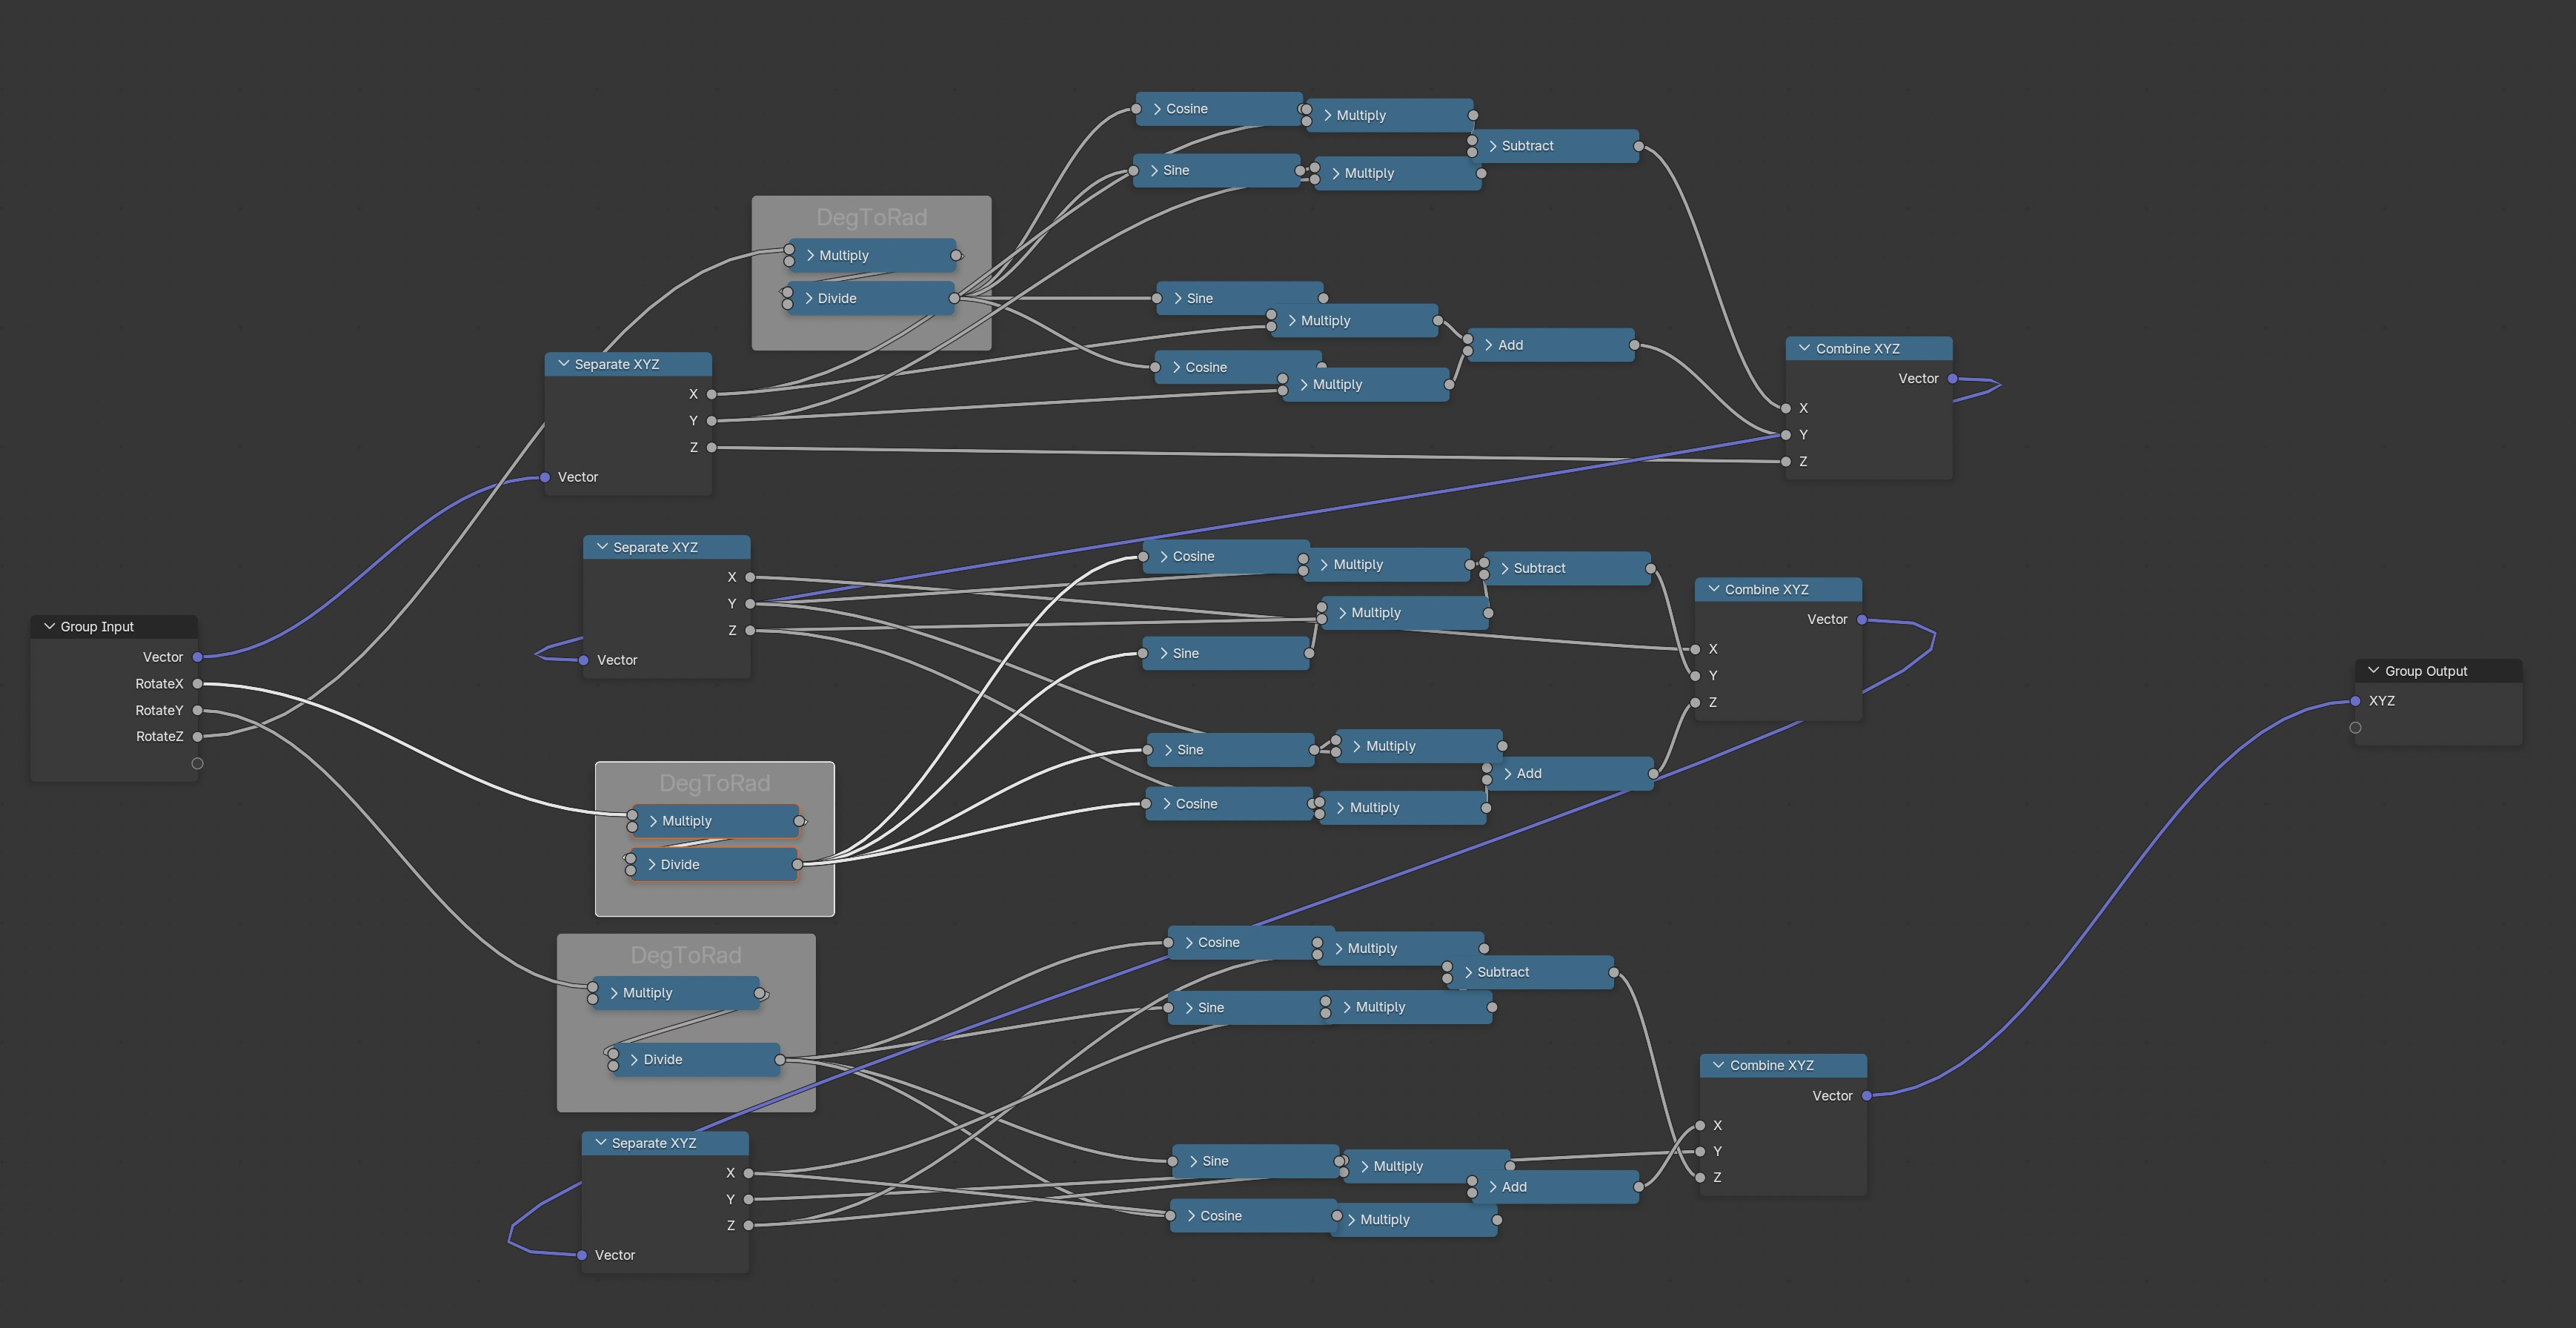
And if I open that Node Group - it will look like this :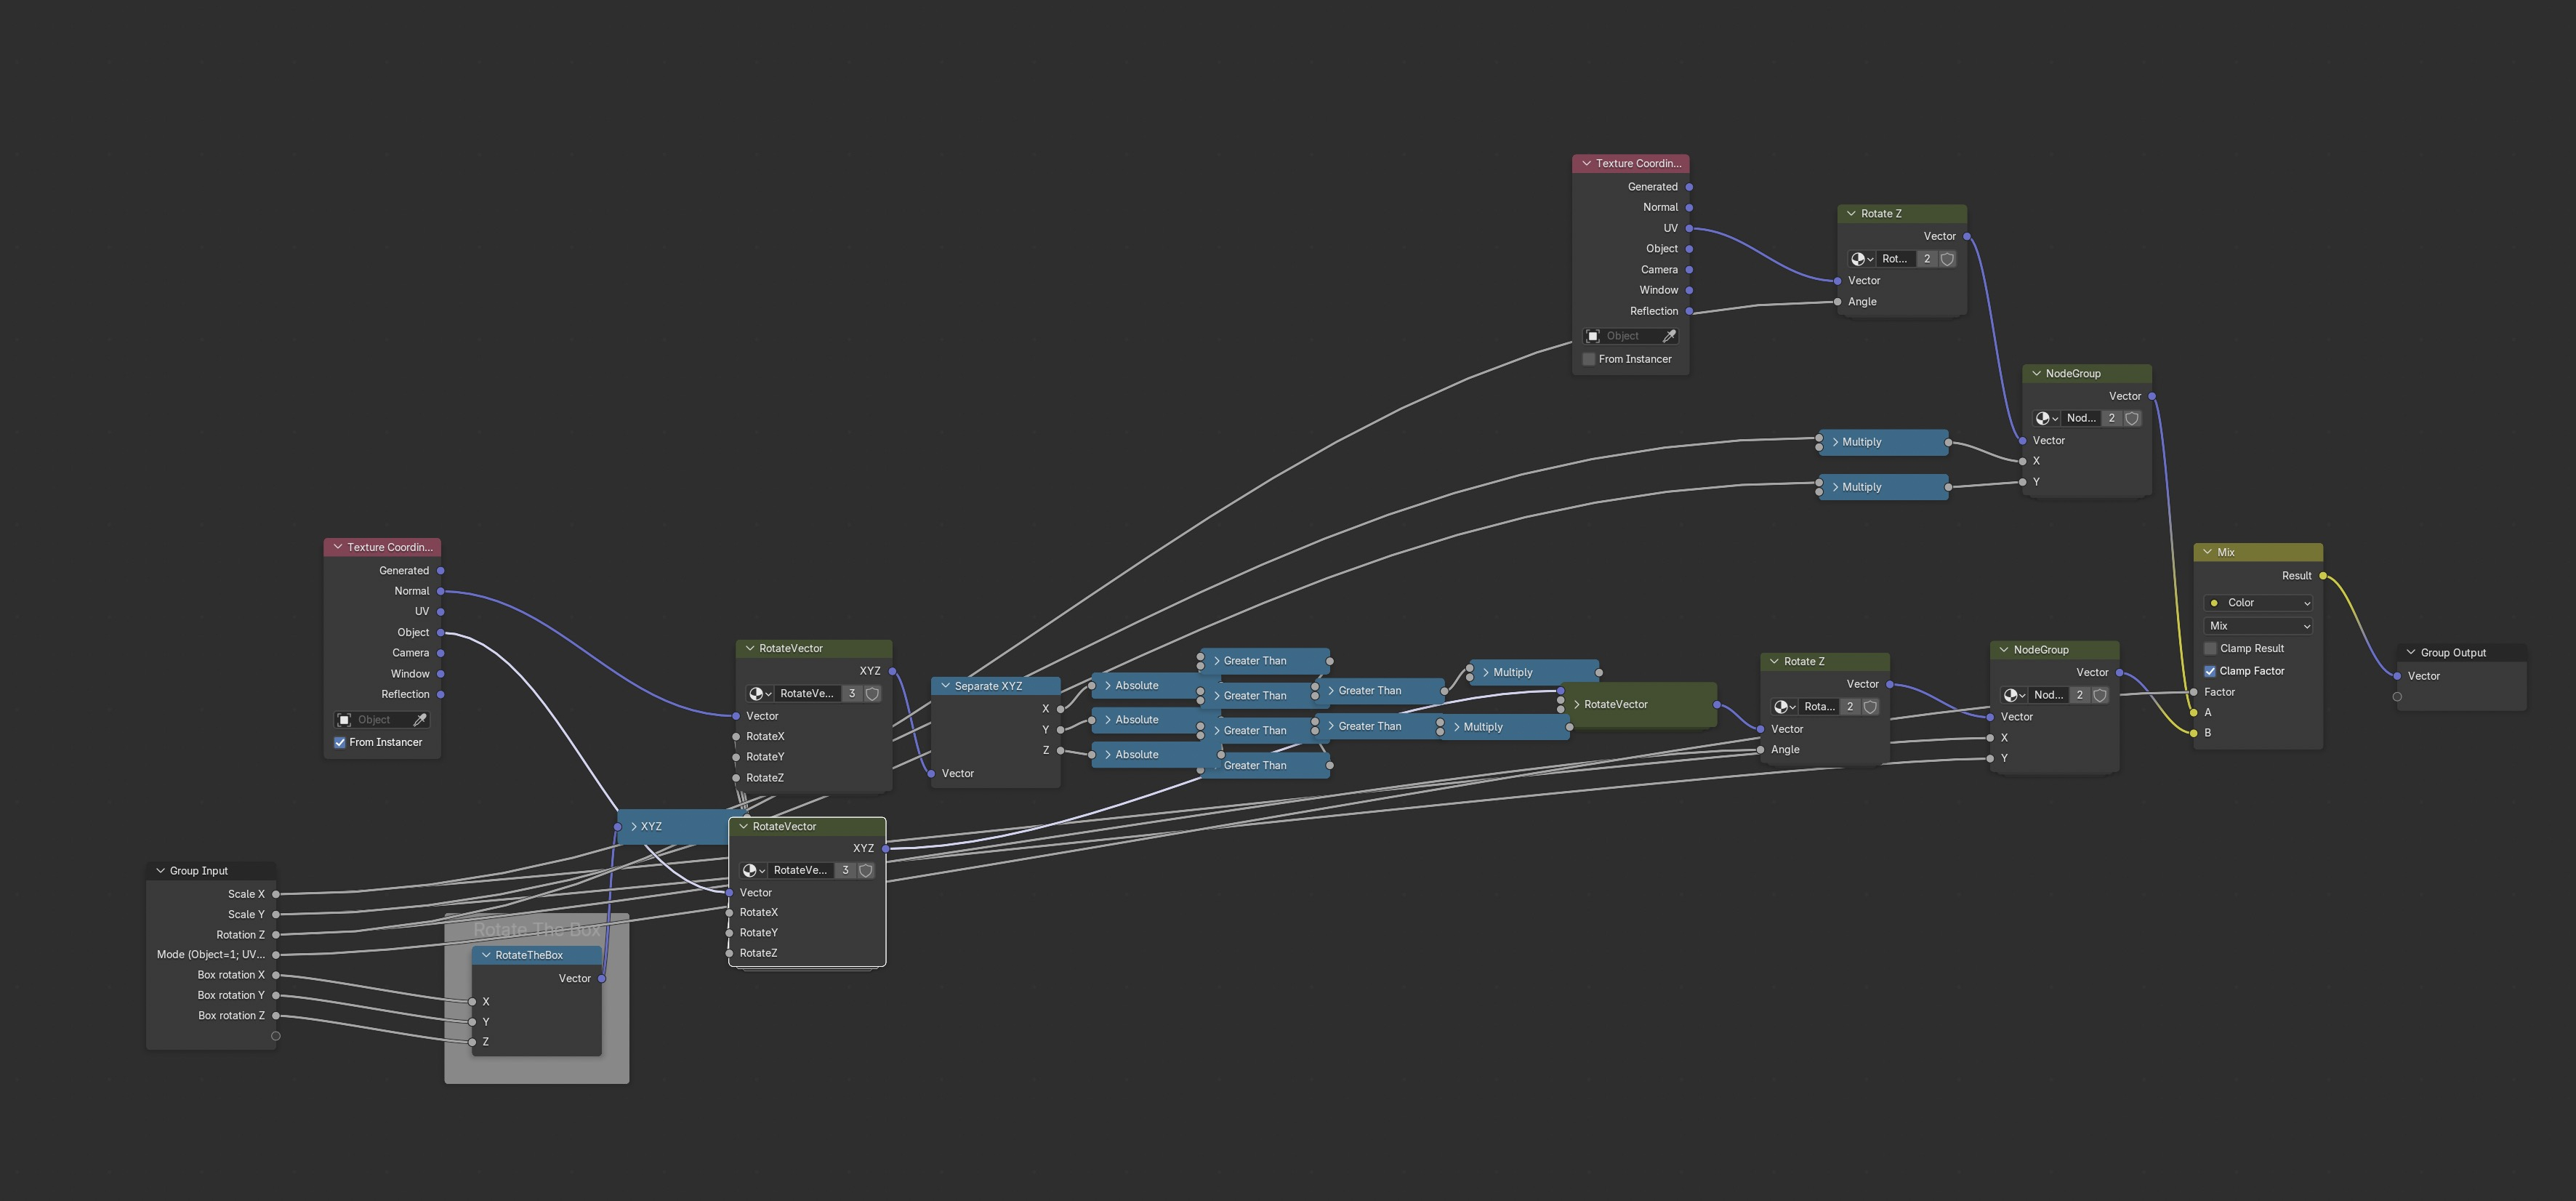
Oh wait, it contains two further Node Groups like this :
So I wonder if the Node Editor is even the right place to solve this. Maybe it is easier in Python.
(*) some even say the Mapping Node is broken 8-{
Sorry, I did not get it .....
Can you elaborate which Scale exactly do you mean IFC Objects have ?
(Does that apply to Bonsai generated Objects only or will the Scale be right for client's or my own IFC exports too?)
Where/which Scale do I have to apply for pure Blender Objects first ?
Where and what does CTRL+A ?
Apply "Object" Scale ?
Like resetting an Object's Scale, which once scaled in Object Mode, to keep their new size but switch Scaling back to 100% - because anything else Scale is just another bag of hurt .... in Blender ?
(I do/check that all the time in Blender, if there is any Object in my Blender files that has no 100% scale - it's a bug)
Did some tests, and without UV-mapping the top and bottom faces don´t have the exact same texturescale. (but thats ok for me).
If you are scale a cube in one or two directions, you have to apply the scale, otherwise the bevelfunction, inset face, also texture... is not working well and you get "non uniform" results, so you have to apply the scale first and this is "Ctrl-A" and "scale".
Sry, if I couldn´t help you in a way thats practical for you... (some textures are procedural others with images and that defines the workflow)
And yes set the imagetexture to flat with uv and box for nonuv boxmapping.
For IFC Objects created in Bonsai ?
(I have not yet textured one ...)
Yes, I know, .... that bag of hurt .... any other object scale than 100% is no option in Blender, in general.
AFAIR in all other 3D Apps, changing the size of objects in object mode also changed their scale numbers - but that was never any problem. Can't remember any uniform issues with things like Inset, wrong distances when Beveling or UV things .....
I wished the Scale would not alter at all when you edit an object's dimensions. I think Scale makes only sense where you will change the scale over time or to bring some randomness to instance copies and such.
For bonsai, i just used outlines and comfy/easydiffusion.
Just for understanding and it´s according to the vid you posted, add a imagetexture in a nodepipeline (shadereditor) and set it to generated (in the imagetexturenode) and you will see the rectangles for texturecoordinates (those should be nice placed and the sidelength should be nearly the same), thats blender works and thats why uv mapping for exact models is useful.
For all the math things (geonodes...), scaling is usefull (factor) also sometimes in the editmode. It is what it is, in CAD tools there a much things that are not possible. (maya, 3dmax I´ve never tried)
🖖
Some hints: If you are doing big projects you should do some parts with gimp, PS, AI... if you getting "blind", because of working days on the same pic, mirror it (to see "clear" again). Set the colorgrading of your monitor to standardvalues (disable also HDR). In blender also set the colormanagement (blender5.0 to rec2020). If you have to create hedges trees enviroment in blender, take a look at the RAM and VRAM (better imagemanipulation). Dont belive the metadata of pictures, use f-spy instead. Tiling of surfaces, because of to small imagetextures creates work at compositing and finetuning and looks aweful. Use HDR´s for lightning, Render in 4k with less samples and scale the pic after.
Here an old indoor pic, it isnt much in there, but everything whats looking real has much geometry, otherwise you have to create normalmaps for this parts.
I do not see rectangles. Do you mean in UV Editor ?
But I am searching for Box Mapping.
Here it doesn't make much sense to need to UV. If you are using tiling Maps, have thousands of simple rectilinear Elements, constant Geometry updates, .... you get the same result with Box Mapping, just by applying the Material, but much faster and reliable.
I already prepared some nice Asset Libraries for Blender, now I want to start preparing a few common Materials. So I am searching for ways to make Box Mapping work in Blender.
I already had bought some Material Libraries for Blender, but so far all rely on UV-ing. So unfortunately not just for drag and drop or for just referencing IfcSurfaceStyles.
for the last time: drag and drop an image (texture) in the shadereditor, and change it to "BOX"

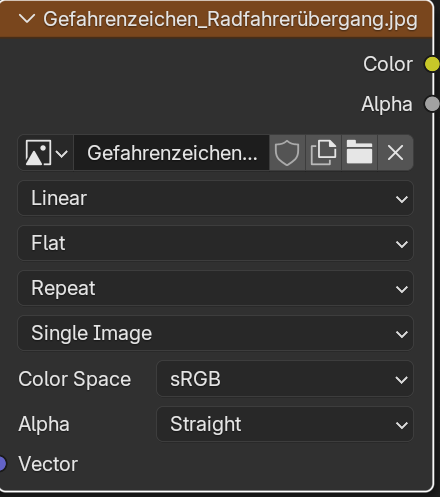
if this nodesetup with "texturecoordinate" and "mapping" isn´t enough....UV-map, but IMPORTANT you have to set the value from "BOX" to "Flat" otherwise the UV-coordinates are not working!
And at "Single Image" you can choose "generated" (Your have to reload the Texture after- if you want to switch back)
:-)
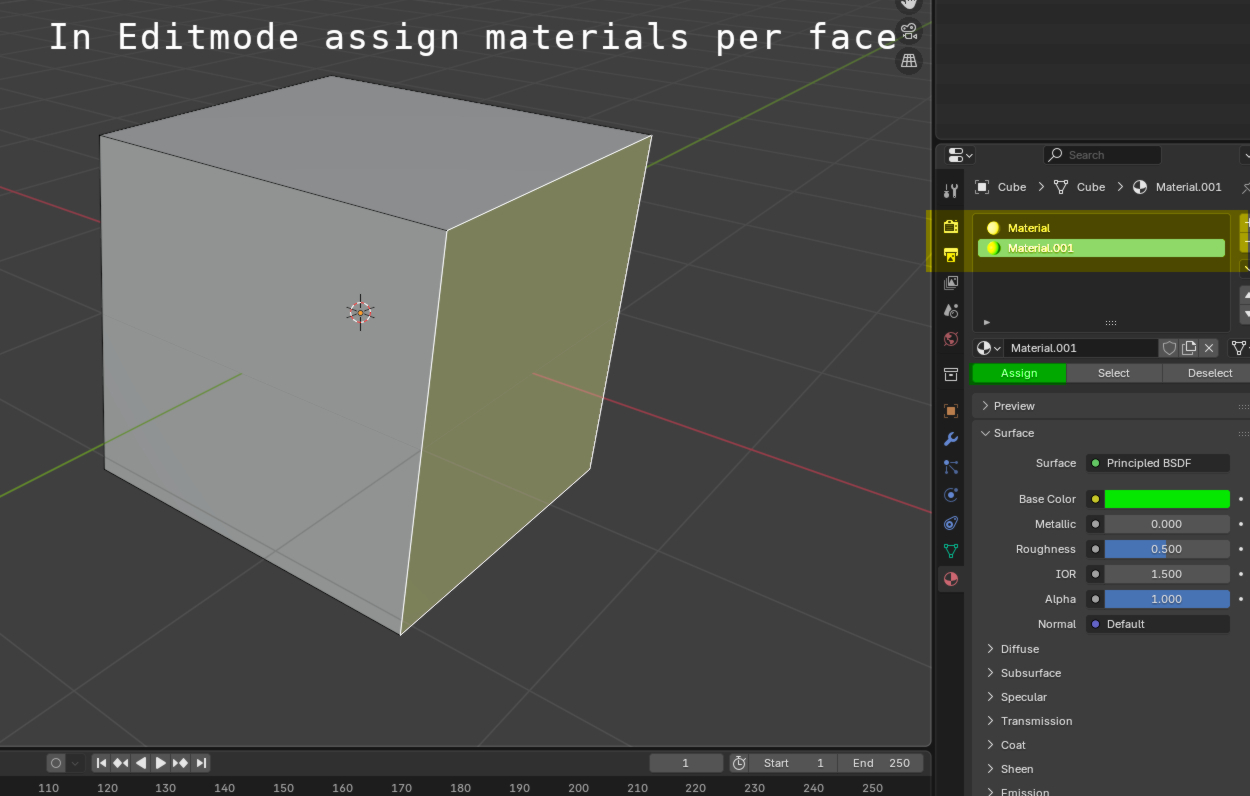
you can also give objects more than one material and apply it per face:
Mapping... have to relax!
Najo, hoffentlich hat die Diskussion an Sinn ghabt und Du bekommst es hin. (Hope it is worth for something)
So far I get it reasonably mapped or UV'ed.
But not yet as comfortable, flexible and reliable for changes or drag and drop like with other Apps.
I pause the Material preparation for a while and go on cleaning up my Libraries.
What a mess .... (parts of Nodes grouped)
As a Material Preset, just giving a Size Adjustment in Units for a typical Texture Package for usual channels.
But still no option to rotate if necessary. As soon as some Axis rotates, Box Mapping option reverts to UV.
Example with only a Diffuse Color and Transmission Map. Does not need to assign UV Dummy geometry.
Object is 12x8x3 m, forced UV Box shall be 1 m.
The Grouped Part :
"Inverse" or "divide 1/Input Value" needed, just for Map size and Texturing Standard. So far no total control without workaround-ing Blender weaknesses by using finally UV - if I can ever control the UV in File Units.