

Jumping extended wall

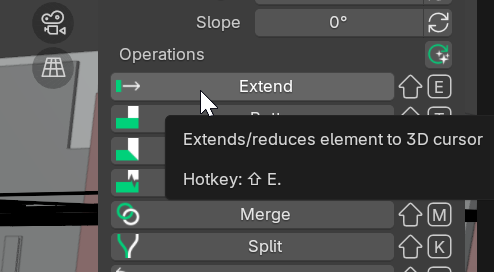
Maybe this is something that has occurred elsewhere, too. I moved my blender lifebelt cursor to an existing wall's corner (vertex), selected the wall to be extended, chose the wall tool and hit shift+e. While the extension did work, the wall was also moved in its y direction. The walls in question do have an angle, are not parallel to the x or y axes . They are horizontal though. The file was originally exported from Revit 2022 as an IFC4 DTV.
The file is quite large, I will try to extract some walls and post it here.
Comments
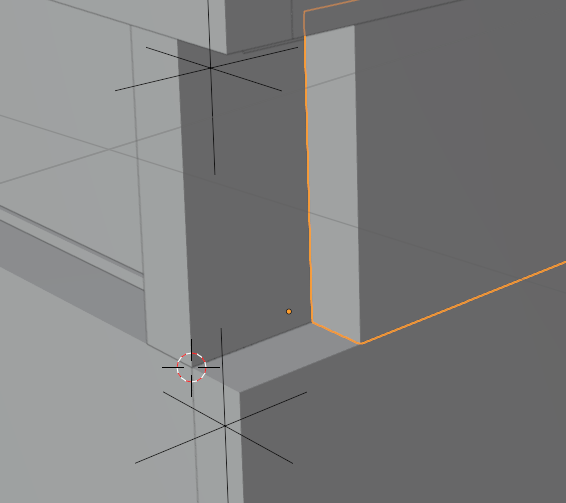
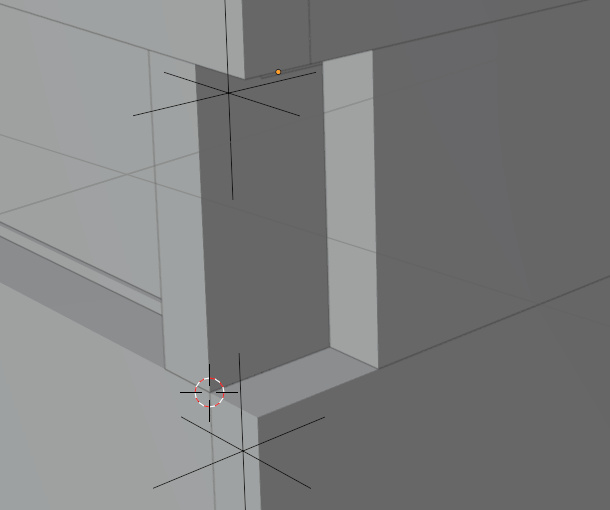
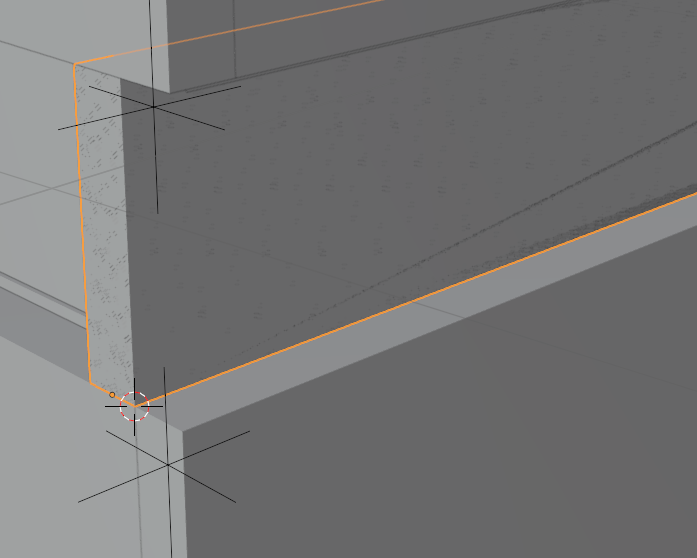
For the pictures to illustrate my text, their order needs to be corrected. The current order shows the third step first, the second picture shows the wall to be extended selected, the third should have come first and shows the cursor at its target position. The last one is correct and shows the extended wall on top of another. Sorry.
@wmi
can you replicate the shift-E issue with a simple file, just a wall or two maybe with an agle similar to the original model, to check if your installation is OK
Is the Wall axis set/registered to outside ?
I assume if you place the Blender Cursor to the vertex of the outer side - the Wall may extend without shifting sideways (?)
(Although I think the Wall should just extend and not move sideways anyway ...)
I tried using the Patch tool to ExtractElements picking some walls that show the phenomenon - only to find that the recipe does not work on the file. It works fine with a new ifc file made inside Bonsai though. I cannot say whether the wall axis is set to be within or outside the wall in question. I found the object base point to be a bit weird though.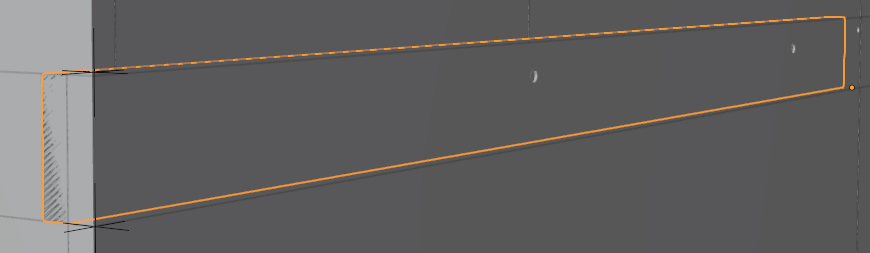
Can you upload a stripped down, or pared-down version of the file that exhibits the problem? Is often easier to troubleshoot the problem that way.
@theoryshaw Sadly I found no way to strip down the piece. there seems to be something fundamentally wrong with the file from revit.
do you have access to the revit file? If so, could you strip it down from the revit side?
Also, try and play around with these parameters if you can... to see if they make a difference at all.
@theoryshaw I do not have access to the original Revit file, which is why I am trying to do my editing in Bonsai. Re-Importing the file into Revit does not work out at all btw.
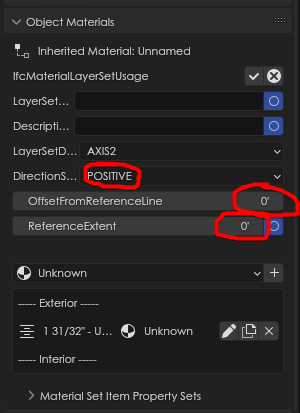
Fiddling with the DirectionSense messed up all other uses of the material. Instead of an 'Unnamed' inherited material, I found it to be 'Is Occurrence Overridden'. Editing the values does make a difference, just not one that helps along the matter. I will manually move the walls I need to adjust.
Thank you all for looking into this.
also too, maybe check and remove the connections. I have a feeling maybe that wall is connected to the inner wall maybe.
Hello,
Did you ever find out what was causing this anomaly?
I'm a complete noob to Blender, Bonsai and all things IFC/BIM related so I'm very concious of what I'm doing (or doing wrong)
I'm currently working my way through the excellent @Ace tutorials on YT and have stumbled at the first hurdle, mere minutes into the first video.
I have followed the video (even at 0.5 speed!) many times but I still get a wierd 'jump' in geometry when I use the extend function.
I have attached a video clip of what is happening (the 'extend' part is at the end), and would greatly appeciate it if anyone had any thoughts as to why this is happeing.
Much like @wmi, I have figured a way around it but I would love to know what I am doing wrong, as I know it'll come back to 'bite me' in the future.
Thank you.
@Kieran This looks like a bug where the extension function is using the original vertices of the wall segment. The transform you applied to the walls doesn't automatically get "applied" to the Ifc model in effect. You can fix this by clicking the "Edit Object Placement" button here:
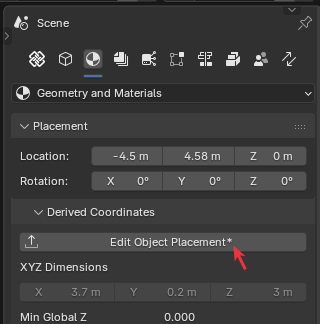
The little asterisk I've pointed to appears after you move the walls, and indicates that there is a difference.
So maybe this is intentional, or maybe the code should account for previous transforms automatically. I'm not sure.
Thank you @sjb007 That worked perfectly as you explained.
Does that me that the 'Edit Object Placment' needs manually updating everytime an object is moved around?
Thanks
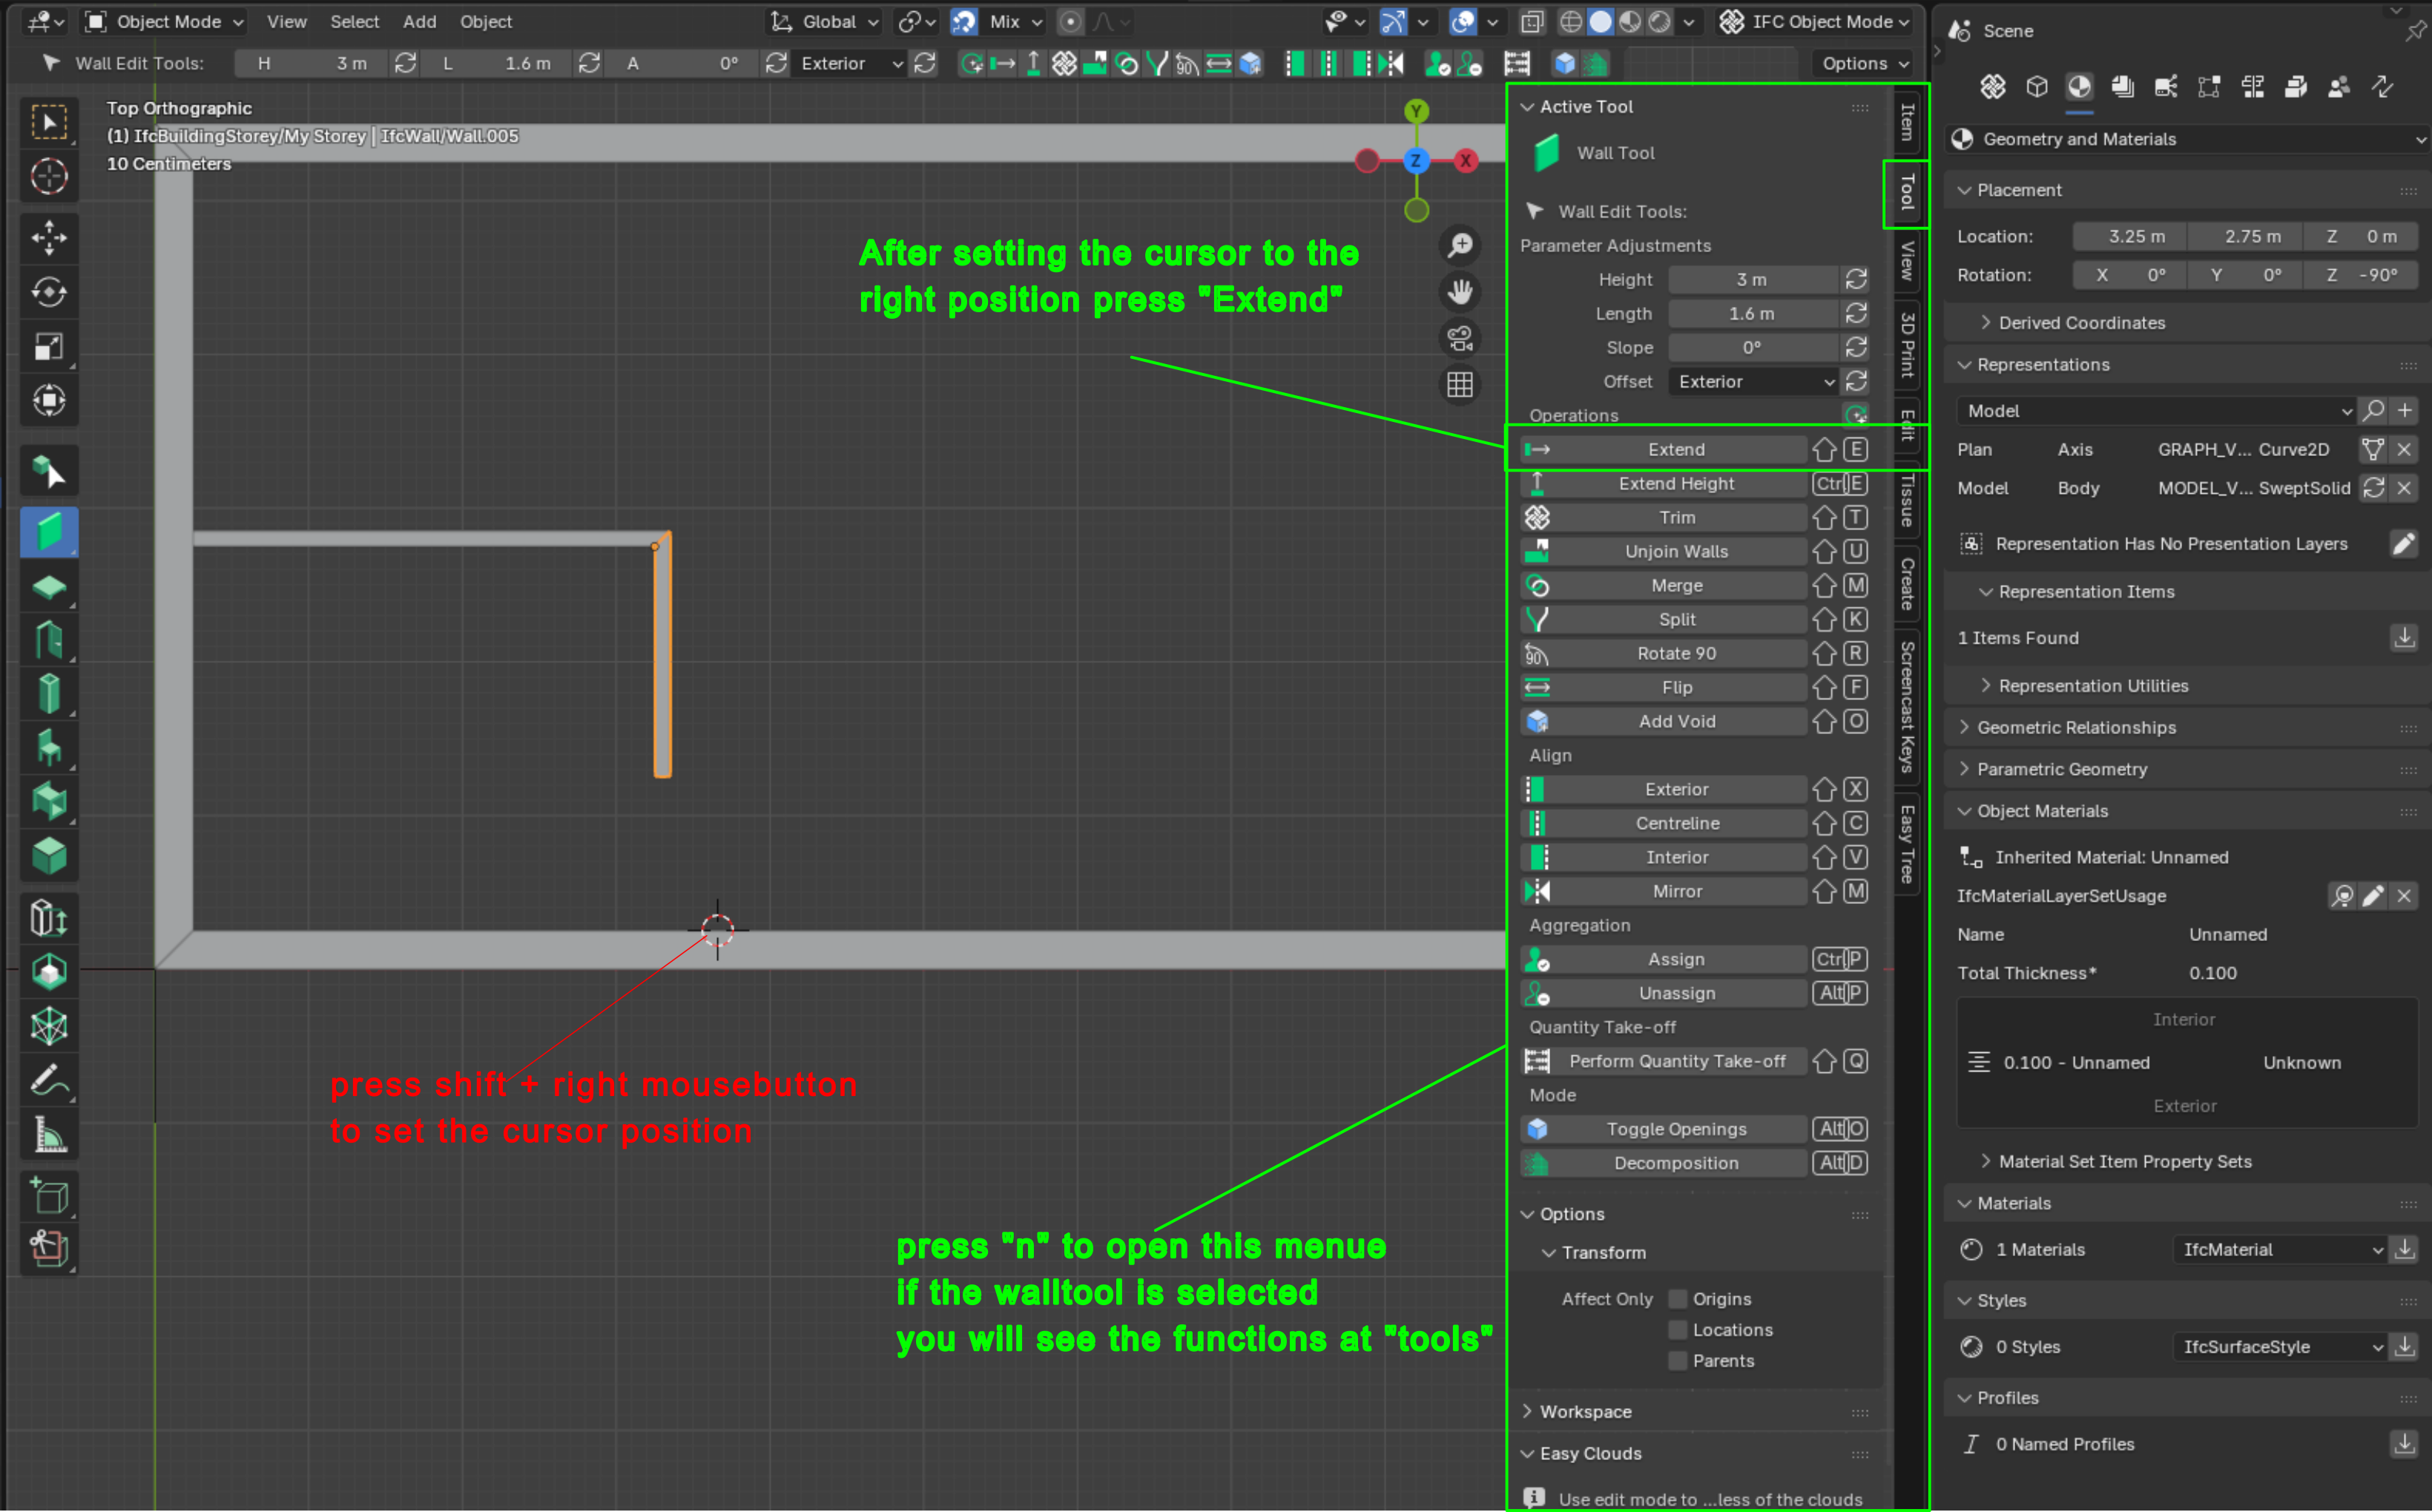
@Kieran You can also try another workflow... take a look at the picture...
Or if the 2 innerwalls having a gap (like at the end of your vid) select both (shift +click) and press the "trimbutton"
@Mas Did you "G" grab and move the dog-leg walls before doing the extend like in Kieran's video? That is the thing that causes the odd behaviour when extending.
@Kieran I can't answer that at the moment with 100% certainty. I haven't been doing a lot of work in Bonsai, but I don't remember having to click that button. It might be new(-ish) behaviour introduced for some reason. I know that if I add a demo bunny and move it, it also shows the asterisk. But if I save and reload, the bunny keeps its new position. I suspect this is specific to particular object types and operators.
@sjb007 if i move the walls, i get also the behaviour with the gap, with and without doing the "extendcommand" with cursor. Sry if i jumped in, i didn´t recognise such things (3clicks "select the walls" press trim) and its done. (maybe I´m sometimes blind for such issues)
After thinking about, I think its causing because there are 2 walls moved together and if the subselection gets edit (without it is recalculated) it have strange behavior. I personally move only one object per step and use the walltools. (If you have parts that rotated and not allign xyz-axis and try to move it together- (doubletap x/y/z you get funny blender behavior except you allign the orientation axis.)
Another hint is to pess "B" after "G" (more cad behavior) to move an object with "pointselection". Workflow: press G rhen B select/cklick a point on the object (that should be moved) (maybe x/y/z for transformorientation) after that click the endpoint.
Thank you @sjb007 and @Mas
Because i'm such a flustered 'noob' to this, I was just trying to understand if it was something I was not doing correctly.
If it is a new (ish) working method (manually updating the 'Edit Object Placment') then that is perfectly fine, as long as I now know, and thank you @sjb007 fro pointing it out... I'd have never found that myself.
@Mas the work arounds, and alterantive options are greatly appreciated. I had worked out several methods of achieveing the required geometry, but I was curious as to why the process that @Ace used was not working for me... I think it helps me learn.
The @Ace tutorials are a great introduction, but unfortunately, due to the fast rate of churn in Bonsai UI and tools, it does mean that tutorials become out of date quite quickly. Making tutorials is time consuming, so it's not feasible to keep them constantly up-to-date. The best thing to do is choose a set of tutorials, and try to use the same version of the application as the tutor. Once you've learned the essentials, then update to the latest software and figure out all the changes to the tools.